
I learned how to make a Beurre Blanc tonight.
It’s an onion/shallot, white wine, lemon juice reduction that’s got a CRAP load of butter mixed in at the end. I served it over homemade Butternut Squash Ravioli. That sauce is gooooooood. THANK GOODNESS it was after my weigh-in at Weight Watchers today.
Usually, I’m not a regular dessert-after-every-dinner kinda girl. I prefer to keep desserts for special occasions.
That being said, I made up a STELLAR dessert tonight.
Of course, puff pastry makes just about anything taste amazing – GOD BLESS the inventor of Puff Pastry (A one Claudius Gele. Thank you Google!).
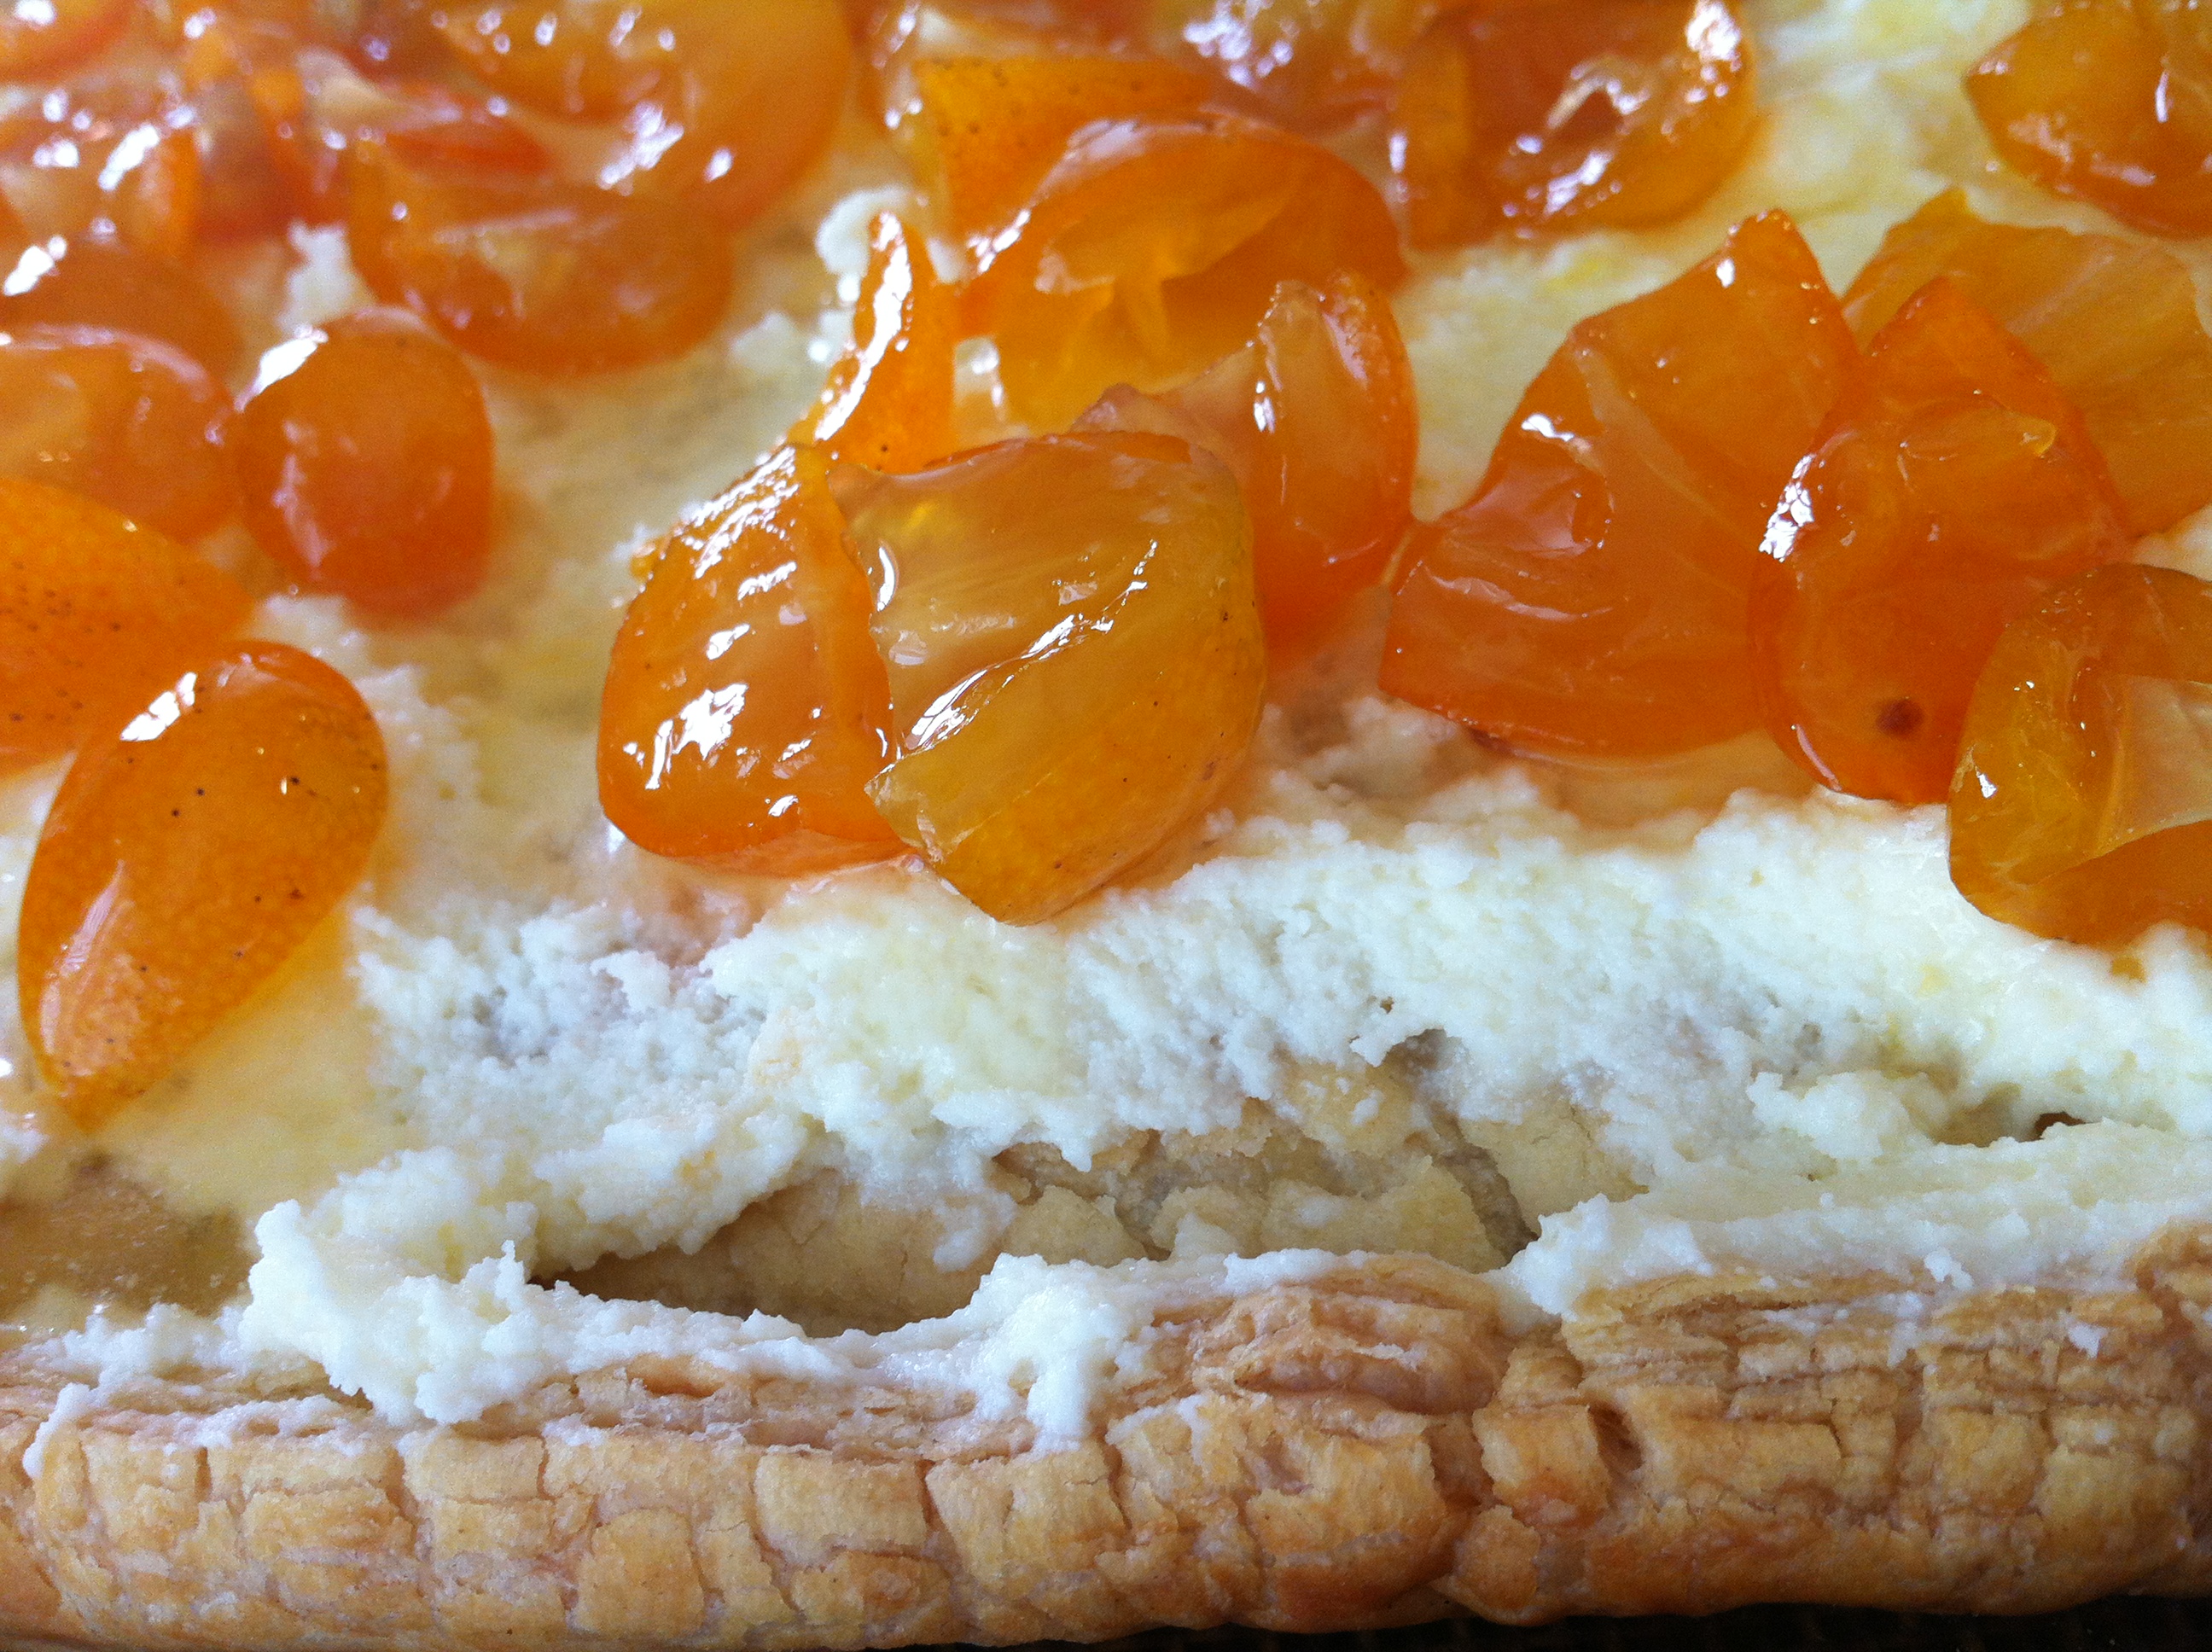
So you roll out some defrosted puff pastry, curl the edges up to look pretty, and then bake it off. When it’s the right color (about 15-20 minutes) you take it outta the oven and let it cool. Then you grab 1/2 a tub of Mascarpone and half a hunk of cream cheese and whip them together. You spread the cheese mix over the cooled pastry. Then you dig into the back of the fridge for the remains of those really great candied kumquats you made a few weeks ago. Strain out the fruit and spread them prettily over the cheese. Drizzle the top of the tart with a few Tablespoons of the simple syrup. Now stand back and bounce a little with joy!
Roasted Butternut Squash ravioli in a Meyer Lemon Beurre Blanc
Homemade Pasta (used as Ravioli tonight) adapted from America’s Test Kitchen
Dairy-FREE
Ingredients:
2 cups AP Flour
Pinch of Salt
3 Eggs
Water, 1 Tablespoon at a time
How To:
1- In the food processor, pulse the flour and Salt a few times to aerate. Add in the eggs 1 at a time.
2- Continue pulsing/mixing until everything looks like coarse crumbs. Start adding in the water 1 Tablespoon at a time.
3- When the dough comes together, dump out onto a lightly floured counter and knead for about a minute.
4- Wrap in plastic wrap for at least 30 minutes. **I made this dough yesterday and whacked it into the fridge overnight. About an hour before getting ready to roll it out, I took it out and let it come to room temp on the counter.
5- Cut dough in quarters. Roll out each quarter to your desired thickness. I used my pasta roller attachment, but you can use anything you like (wine bottles, rolling pins, etc). I rolled my pasta to a 7 then laid them out on a floured counter to fill with ravioli filling (Filling recipe below)
6- Cut your pasta however you’d prefer and then dust with flour and set aside.
7- Cook by bringing a huge pot of very salted water to boil and dropping in your pasta. Fresh pasta only take 3 minutes to cook – so don’t wander far! Drain and serve!

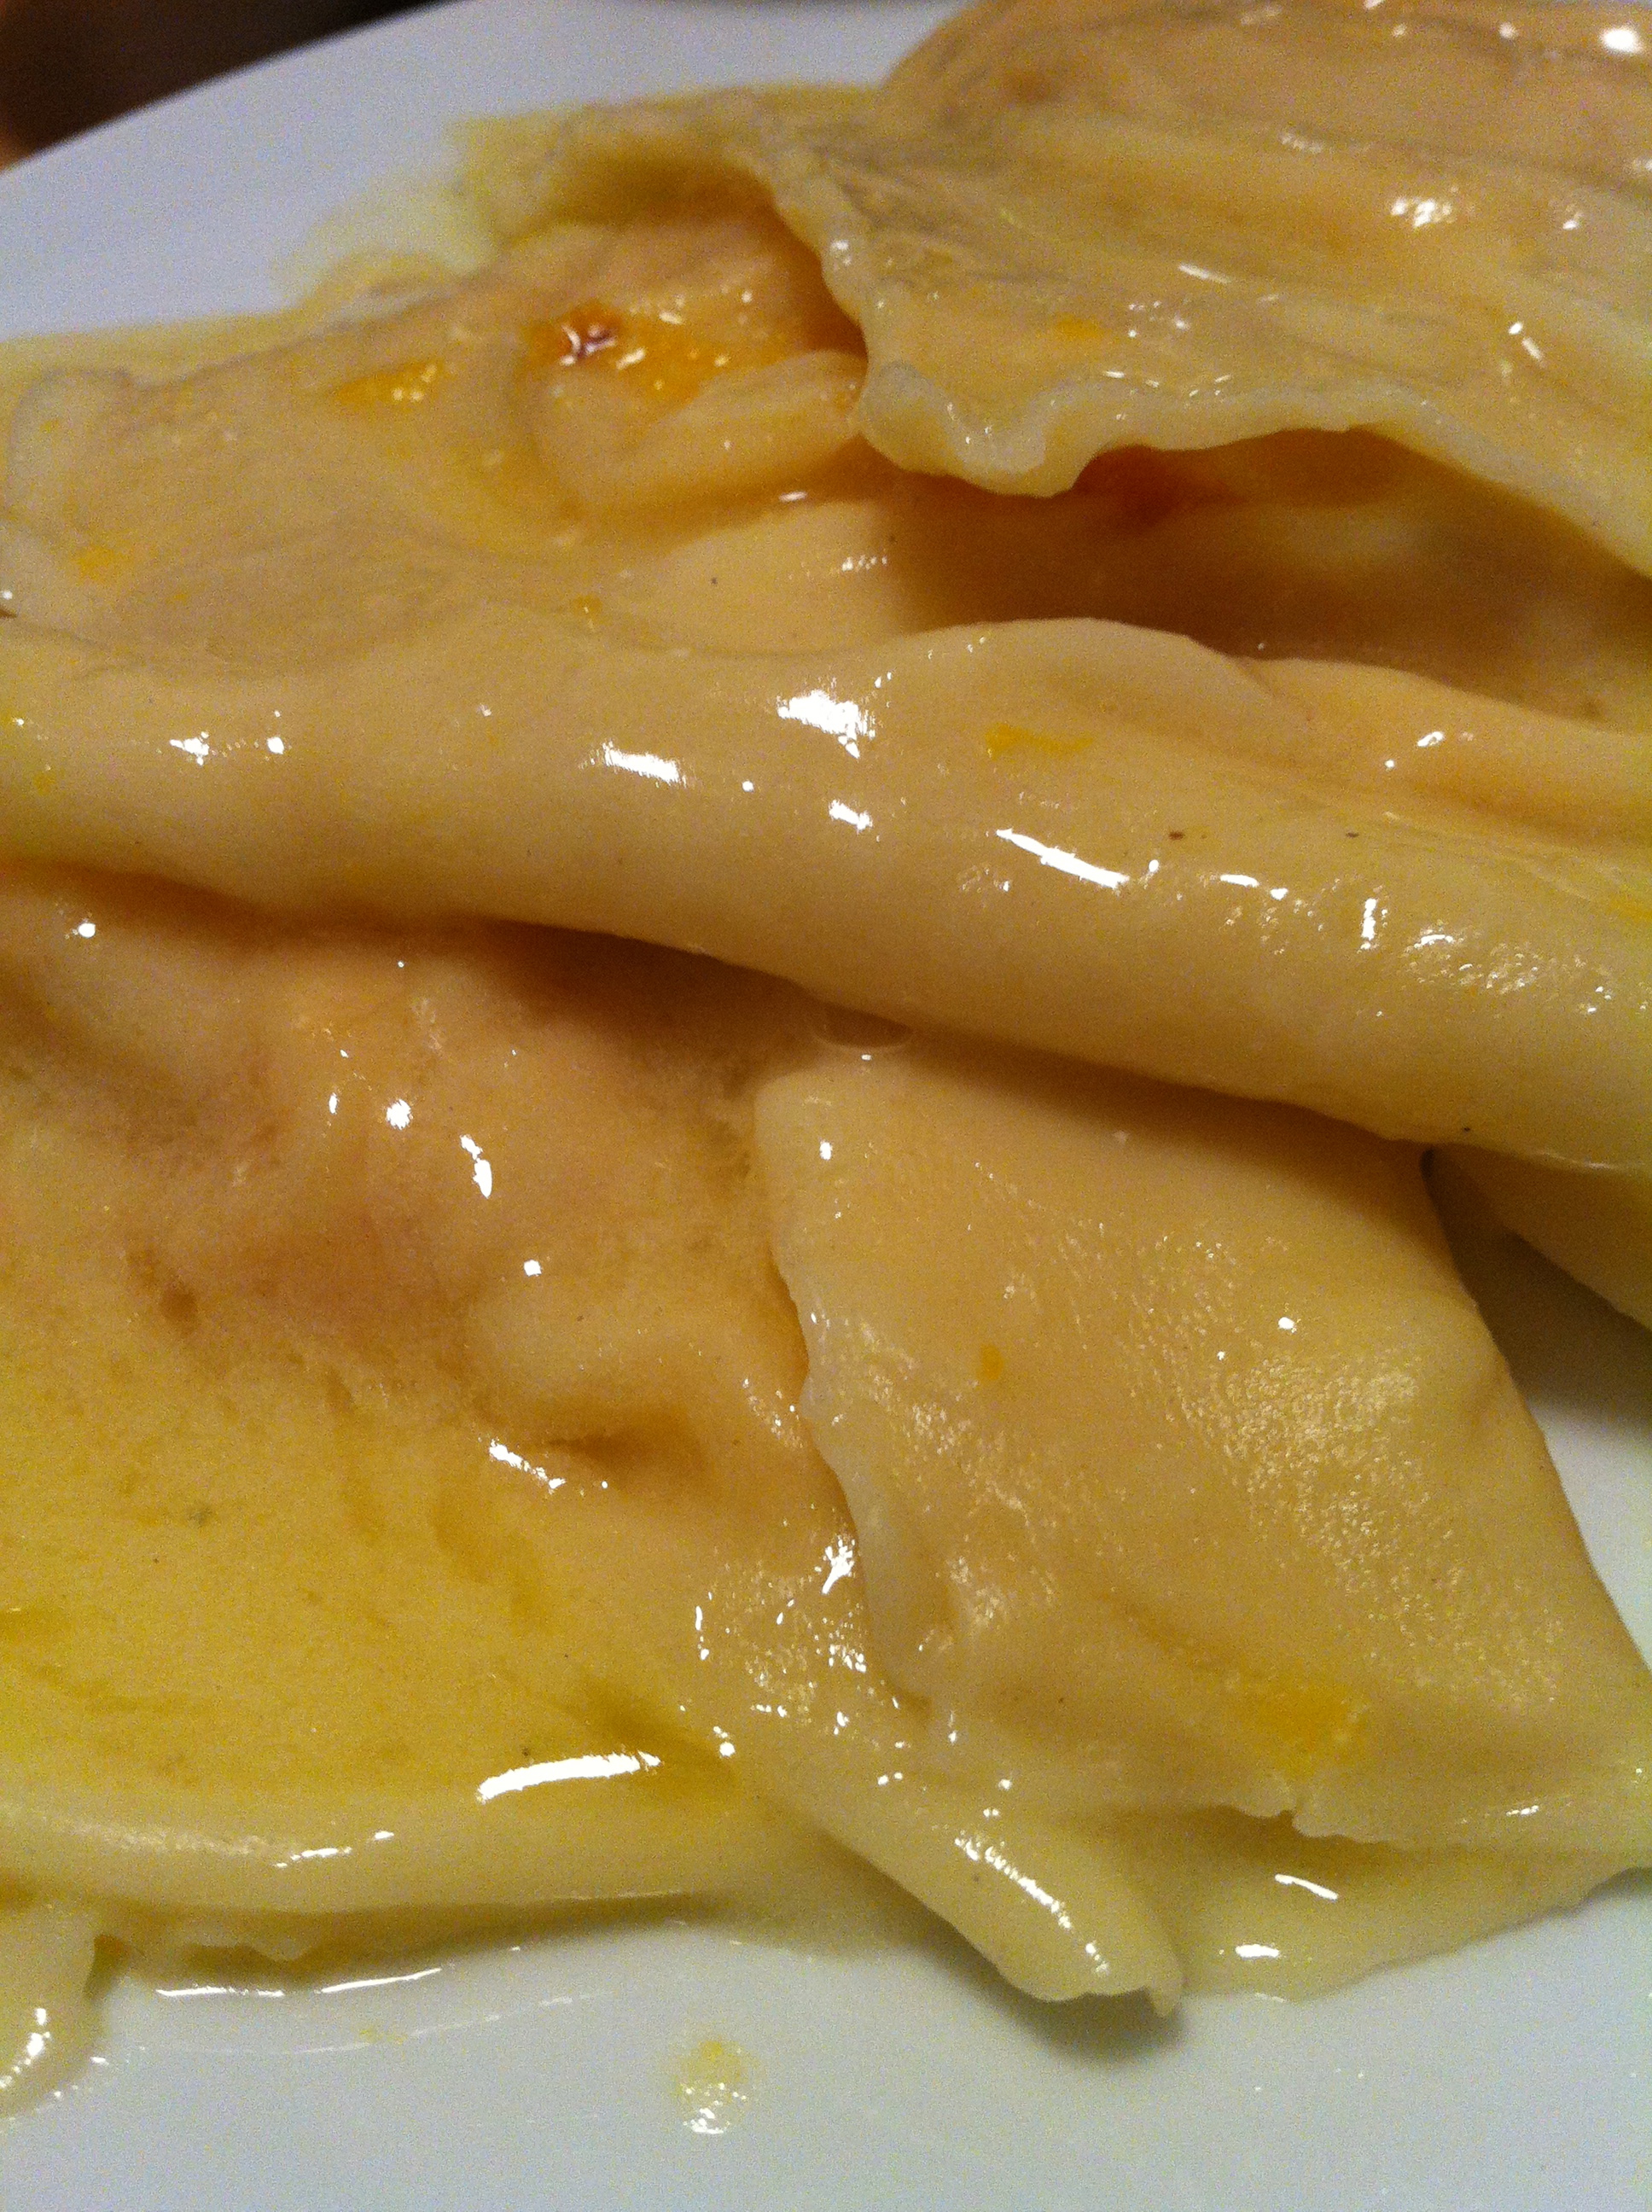
The pasta was too delicate to be served this way…Shoulda been served in a single layer.
Roasted Butternut Squash Ravioli Filling by Me
Gluten-FREE
Ingredients:
2 Butternut Squash, Halved and De-seeded
Olive Oil
1 Egg
1/2 cup Ricotta
1/4 cup Parmesan
Fresh Pepper
How To:
1- Oven to 425ºF. Lay your butternut squash halves out on a baking sheet, cut sides up…well, that’s the way I always do it….I don’t suppose you have to do it that way. Huh. *shrugging shoulders*
2- Drizzle with olive oil (about a Tablespoon total). You don’t want to soak the squash, just help with the browning.
3- Into the oven they go, for 30-45 minutes. You’ll know they’re done when a knife easily slides in/out of the thickest parts of the neck of the squash.
4- Let cool (takes at least an hour).
5- Scrape the flesh out with a spoon into a large mixing bowl. Dump in everything else and mash well. Actually, it needs to be puréed. Either use your food processor or immersion blender or whatever. The end result should be very smooth and fine. Set aside while you make your pasta.
Assemble Ravioli
1- Lay strip of fresh pasta out on a floured counter. Add a series of heaping Tablespoons of the ravioli filling along the strip of pasta, leaving about a 1″ border around each filling mound.
2- Wet your finger (you should grab a small bowl of water now), and run it around the filling mound on the layer of pasta.
3- Lay a second strip of pasta over the top, allowing for draping. Now, firmly press the first layer into the second to seal the filling in.
4- If you have a fluted ravioli cutter, grab it outta the drawer now and use it to cut your ravioli. If you don’t have one a pizza wheel or a plain old knife will work just fine.
5- Dust with more flour and set aside on a floured baking sheet until you’re ready to use. Uncooked pasta can be frozen.
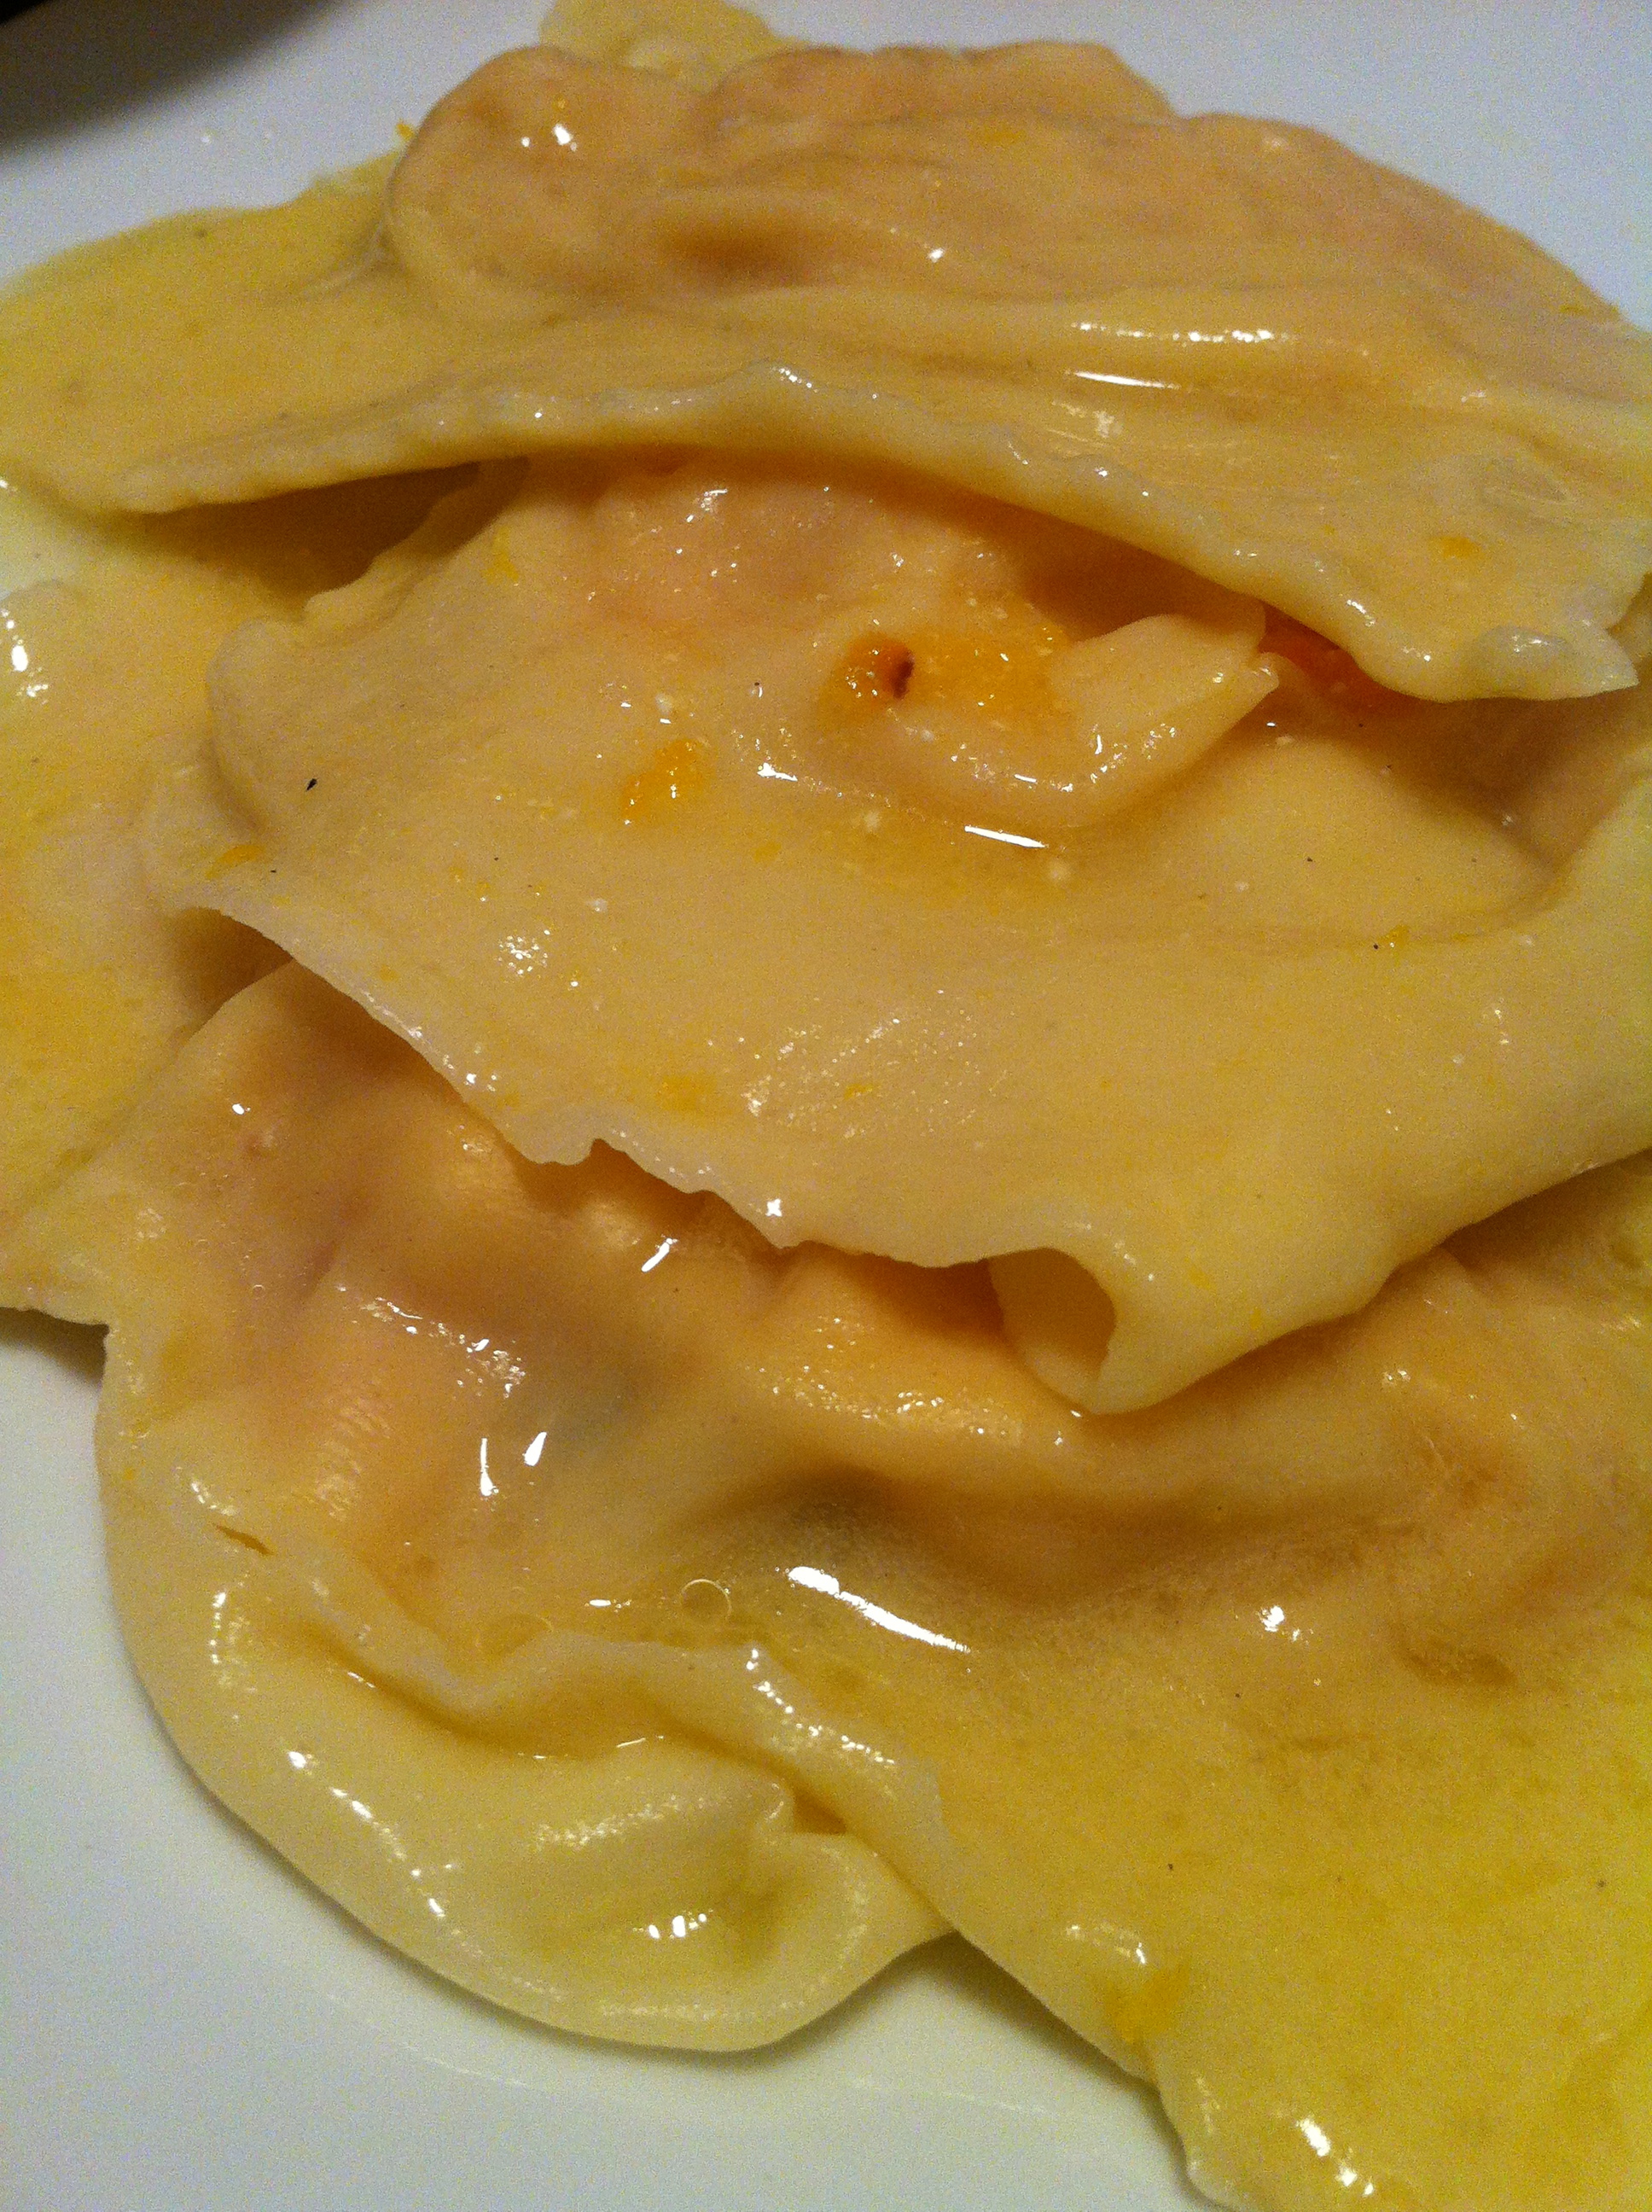
This sauce was SO freakin’ delicious
Meyer Lemon Beurre Blanc adapted from several recipes, but I took most from THIS recipe
Gluten-FREE
Ingredients:
1 very small Onion or two Shallots, finely chopped
1/2 cup White Wine
2 Meyer Lemons, you’ll use juice and peels – wash well.
2 sticks of Butter (1/2 lb.), cut into 1 Tablespoon chunks
Sugar **Only if your sauce is out of balance and needs a little ‘something’. If it does, add in by the 1/2 teaspoons until your sauce tastes ‘right’.
How To:
1- Into a medium saucepan you’ll put the chopped onion and the wine. Now squeeze the lemon straight into the pan – I use the twisting-fork method. By this I mean I slice the lemon in half, then jab my fork in and twist all the juice out. You’ll be straining the sauce later, so it’s okay for the seeds and the peel to go right in. The peel has an awful lot of flavor, so you really should make sure to include it in this sauce.
2- Reduce the sauce by half over a medium heat – it should look a little syrupy. Stir often!
3- Strain the sauce and use the back of a spoon to mash the solids to get all the liquids out. Discard the solids. Return the liquid to the pan.
4- Return the pan to the stove and start adding in the butter a few Tablespoon chunks at a time. Either whisk the butter into the sauce or keep the pan swirling. Several recipes recommended ‘swirling’ – we used a rubber spatula in a non-stick pan and just kept the sauce moving until the butter was melted in.
5- TASTE. Our sauce needed a teeny touch of salt and a few cracks of pepper.
6- TASTE AGAIN. Oops! Now our sauce was too salty, so we threw in a teaspoon of white sugar (1/2 a teaspoon at a time). IT WAS DELICIOUS!!!
Tonight I poured the sauce over the ravioli when it was laid out on a platter. Feel free to toss your pasta in the sauce – or you could serve this sauce over just about any protein! I imagine it’d be gorgeous over fish.
Seriously – my new favorite sauce. At least on nights when I’m not counting calories! *grin*

I told C that I’m glad I’m leaving tomorrow – otherwise I’d EAT THIS WHOLE THING!
A Stellar Dessert (aka Kumquat Tart) by Moi
Ingredients:
1 sheet of Puff Pastry, thawed
1 Egg, beaten
8 oz. Mascarpone (1/2 of one of those big tubs they sell at BJs or Costco or wherever I got it)
4 oz. Cream cheese (1/2 a block)
1 cup Candied Kumquats **Any candied fruit would work here
3-5 Tablespoons of the Kumquat Simple Syrup
I shoulda brushed the crust with some egg to make it look prettier
How To:
1- Oven to 375ºF. Roll out the Puff Pastry just a little and lay on a baking sheet. Roll the edges up just the slightest little bit – just enough to give your tart a decorative edge. Prick the pastry all over with a fork (so it won’t puff up too much when baking). Brush with the beaten egg to add sheen.
2- Bake for 15-20 minutes, rotating often to ensure even browning. When the pastry is a lovely golden color, and looks cooked through, remove and let cool for several minutes (otherwise it’ll melt the cheese mix).
3- In a bowl dump the 2 cheeses (mascarpone and cream cheese) and mix well. I used a hand mixer to get them thoroughly incorporated and to give them a little bit of a whipped consistency. Feel free to use your stand mixer or your wrist.
4- Spread your whipped cheeses on top of the cooled pastry. Top with your fruit. Try to spread the fruit out prettily (It’ll impress everyone). Drizzle a few Tablespoons of the syrup form the candied fruit over the top. It will add just a touch of sweetness and bring the whole tart together.
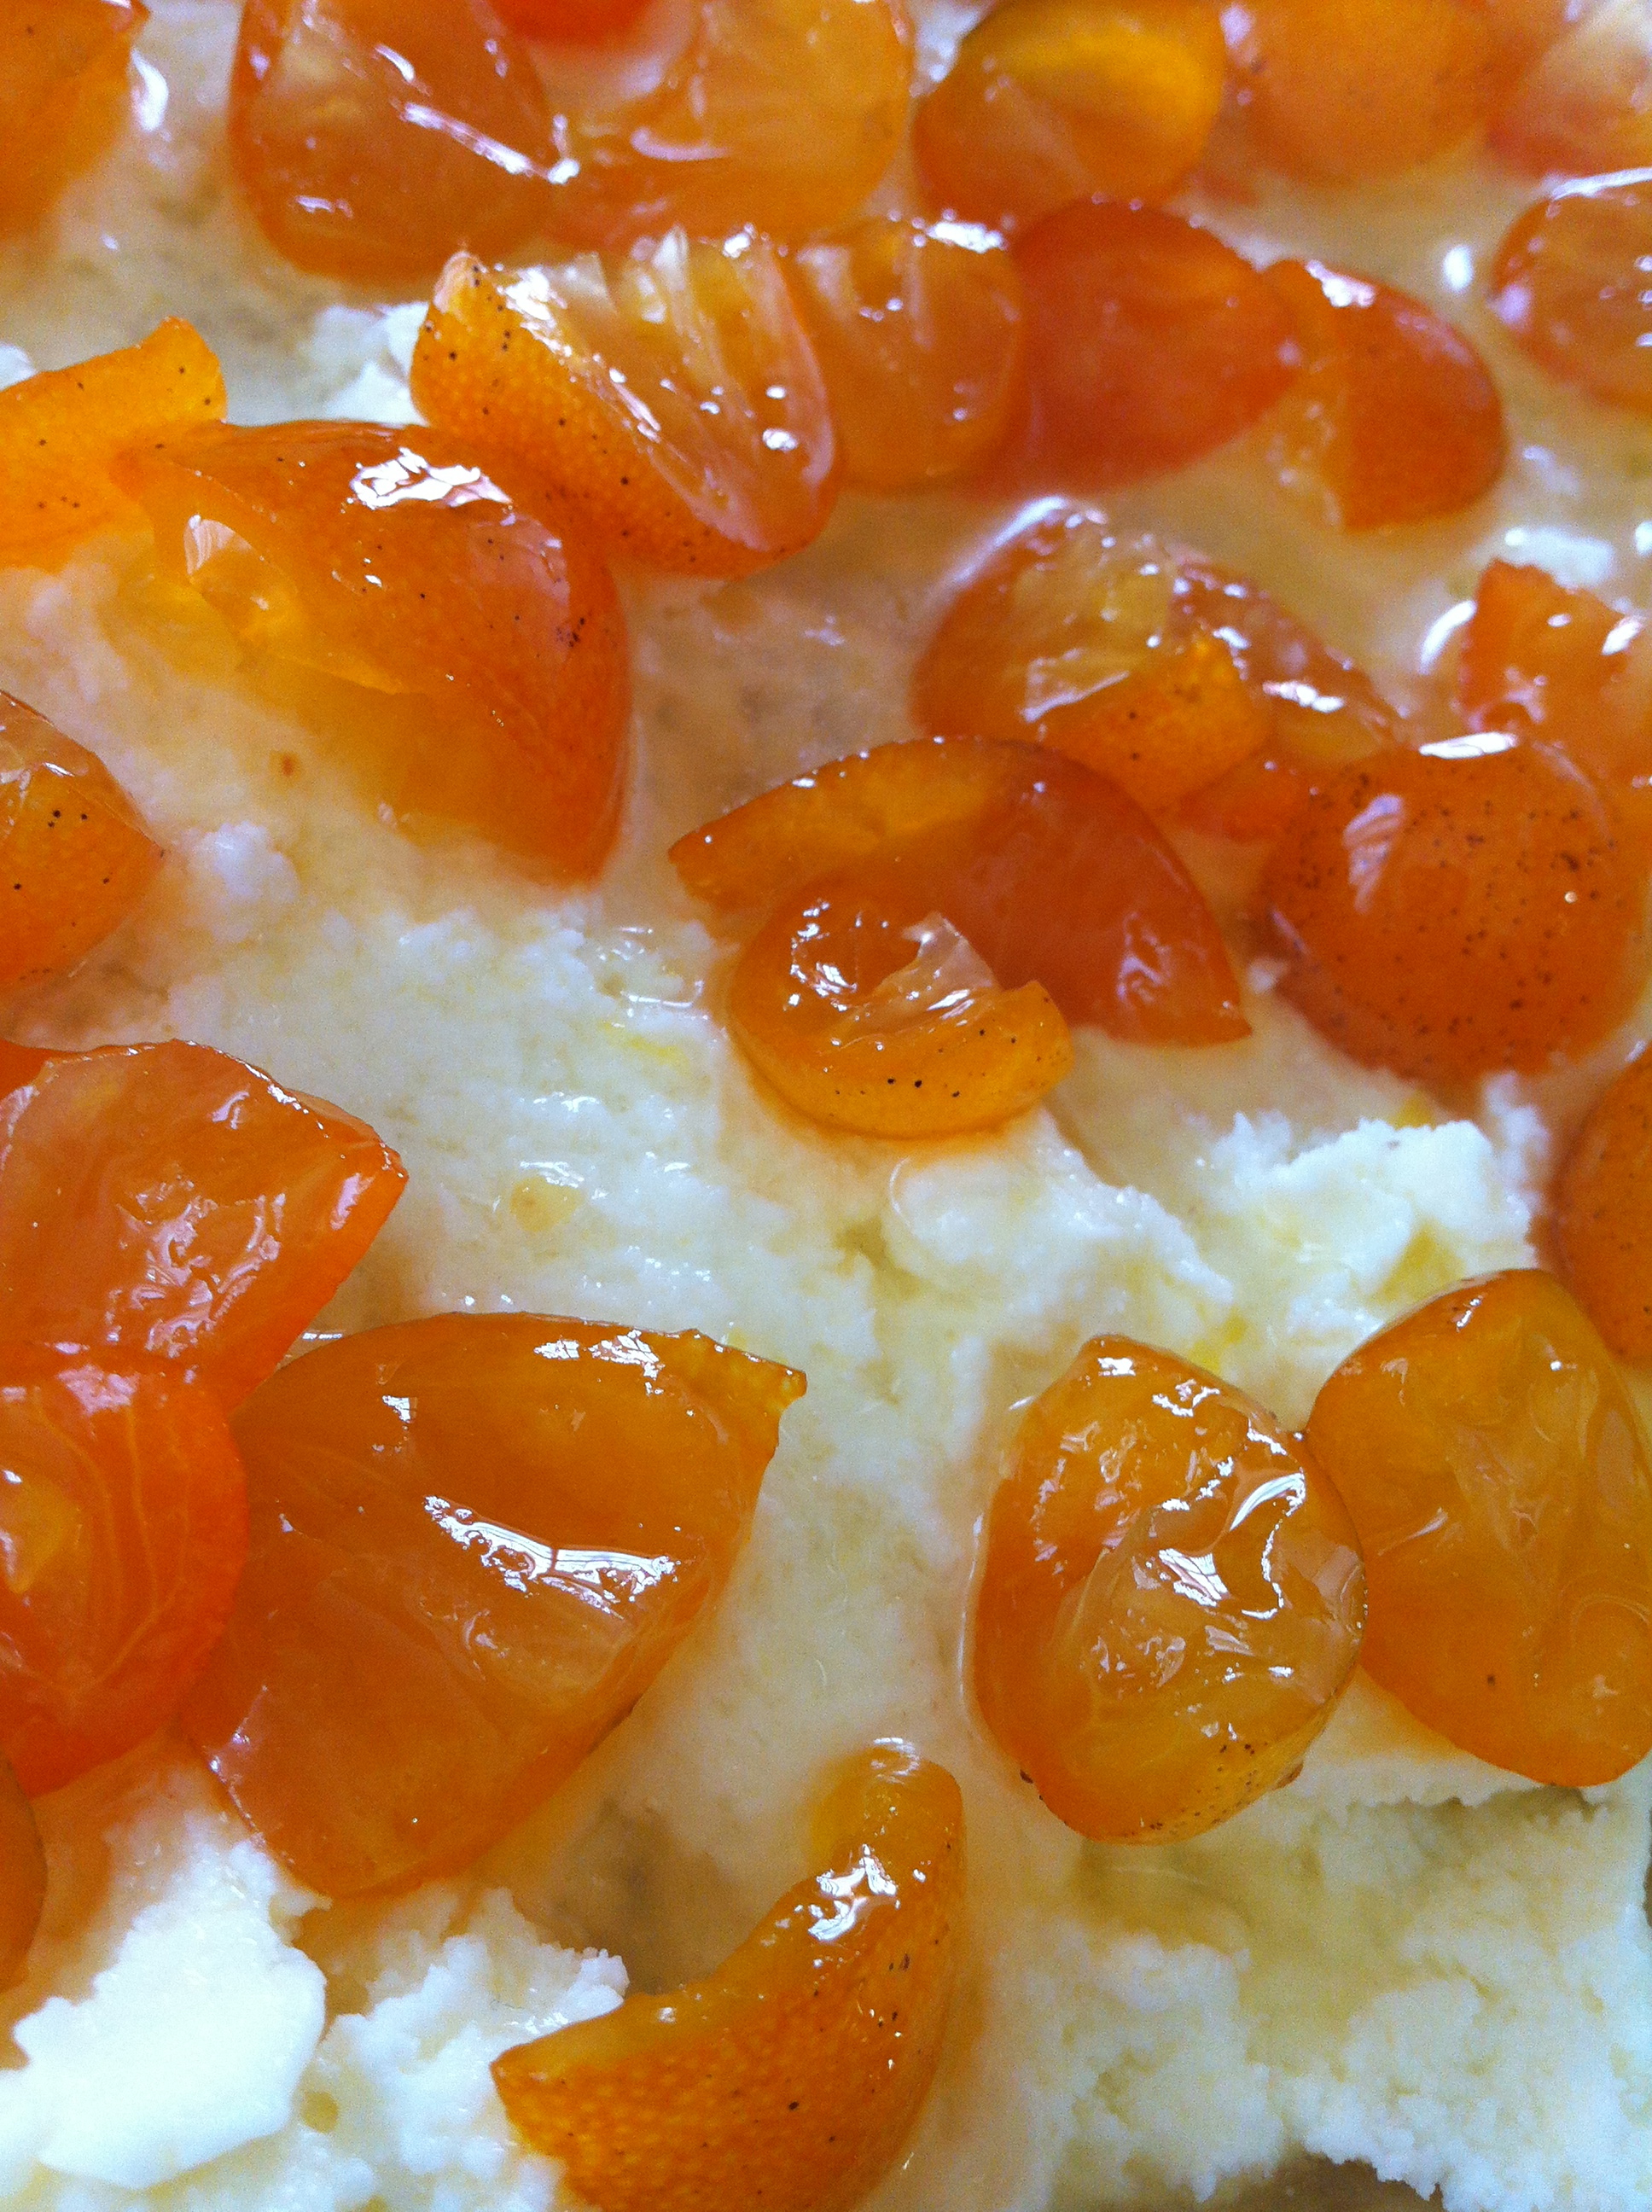
I drizzled some of the simple syrup on top to add a touch of sweetness
End Results: The babies loved the tart, but not so much the pasta. C and I both thought the pasta and sauce were, as my sister the Chef puts it, AMAZEBALLS. The filling – well, it should’ve been puréed. It was a little chunky. Ahh well. Live and learn. I will totally be making this sauce again….but with that amount of butter, you can bet it’ll only be for a very special meal!
The tart?
YOWSA.
Seriously, this tart was soooooo good. I looked at C and said, “WOWEE I’m glad I’m leaving in the morning. Otherwise I’d EAT THIS WHOLE THING.”
I had that sorta maniacal gleam in my eye too, so he’d know I was serious.

Can you hear me clapping?
