When C walked through the door after bringing E home, the first words I said were, ‘Seriously. I must love you.’
He looked at me quizzically, and was like, ‘Wha?’
‘Seriously, I must love you A.LOT. Because if I didn’t I woulda chucked this whole freakin’ pan into the garbage, like THREE HOURS ago. I am OVER homemade pierogi.’
And then I went back to crimping those stupid pierogies – only 4 more to go, 3 more, 2 more, DONE.
Extra pierogi circles? F*ck it. I threw them in the garbage.
I am DONE.
My goodness. I had NO IDEA that it’d take me ALL FREAKIN’ DAY to make these suckers. And no, suckers is NOT the word I’ve been calling them all day long. But only in my head, as R is in the repeat-everything-mommy says phase. *sigh*
Know what gets my goat even MORE? I *thought* I was getting ahead of the game by prepping the veg ahead of time. No. Turns out that’s what you NEED to do, unless you have 6 people to help you and enough counter space to to wrap around your house twice. *SHEESH* I’ve been on my feet cooking since 2p. We ate dinner at 7:30p.
The filling is mashed potatoes mixed with fried onions – remind you of knish filling? Yep. Except this uses Farmer’s Cheese mixed in too. No idea why though. That stuff is tasteless. Totally tasteless. If I were E.V.E.R. crazy enough to make these things again, I’d sub in Ricotta and add a ton of garlic powder. Prob salt too. Yeah, salt.
Not that this was bad or anything. In fact, C was all like, THESE are AWESOME! Even E ate most of 2! I think if I’d given her some dipping sauce (her current sauce of choice is BBQ), I think she’d have asked for seconds…maybe.
Anyway, after spending 67x as long making the stupid dough, and filling them, and then boiling them – I passed the baton to C. He took over the frying. And really, what doesn’t taste better after a butter bath? (don’t answer that).
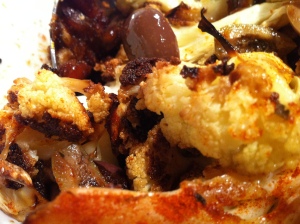
I served this with a side of Sweet and Sour Red Cabbage and Roasted Cauliflower tossed with Dates and Olives.
The sides ROCKED, btw. C and I finished the cauliflower. I had seconds of the cabbage. *sad tired grin*

Laying on a flour-dusted sheet
Potato-Cheese Pierogi adapted from Beata Zatorska in this month’s Finecooking.com
Printable Recipe HERE
Ingredients:
Filling
1 1/2 lb. Russet Potatoes, peeled and cut into 1″ cubes
Salt
3 Tablespoons unsalted Butter or Olive Oil
3 medium White or Yellow Onions, finely chopped (about 3-3/4 cups)
10 oz. Farmer cheese, crumbled (about 2 cups) **I thought I’d bought the 10oz. package. Alas, no. It was the 7.5 oz. **Sub in Ricotta. Farmer’s Cheese is blah.
Freshly ground Black Pepper **I’d also add in some Garlic and Salt. Start with 1 teaspoon of each. You can always add more…
For the Dough
2 lb. (7 cups) All-purpose Flour; more as needed
4 oz. (1/2 cup) unsalted Butter, softened
2 cups Warm Water
For cooking and serving
Salt
4 oz. (1/2 cup) salted Butter
1 cup Sour Cream **We were out. Such is life.
How To:
Make the filling
1- Put the potatoes in a 4-quart saucepan with enough cold salted water to cover; bring to a boil over high heat. Lower the heat to maintain a steady simmer and cook until the potatoes are tender when pierced with a fork, about 15 minutes.
2- Drain, return the potatoes to the pan, and dry them over medium heat, stirring, until they look floury and leave a light film on the bottom of the pan, about 3 minutes. Mash with a potato masher until smooth. Transfer to a large bowl and set aside.
3- Heat the butter in a 12-inch skillet over medium heat. Add the onions and cook, stirring occasionally, until deep golden-brown and soft, 15 to 20 minutes. Reserve half of the onions for garnish and add the other half to the potatoes. Add the cheese, 1 tsp. salt, and 1/2 tsp. pepper and mix until well combined. Let cool to room temperature before using.
Make the dough
4- Put the flour in a large bowl. Add the butter and, using your fingers, work it into the flour until the mixture has the texture of coarse meal. Add 1-3/4 cups of the warm water and stir with your fingers until the mixture begins to come together. If the mixture is dry, you can add up to 1/4 cup more warm water, 1 Tbs. at a time, until it forms a shaggy yet cohesive yet mass. **I needed the whole 2 cups.
5- Turn the dough out onto a well-floured work surface and gently knead it just until soft and elastic; the dough will not be completely smooth, but it should be easy to shape, with a Play-Doh-like consistency. Avoid overkneading, or the dough will become tough. (At this point you can proceed with the recipe, or let the dough rest on a floured surface, covered with a clean dishtowel, for up to 1 hour.) **I was worried about overworking the dough. I’m ALWAYS worried about overworking the dough. I have no idea what over kneaded pierogi dough feels like. I find that lack of knowledge frustrating.
Roll and cut the dough
6- Line a large baking sheet with parchment and dust with flour. Divide the dough into 6 orange-size balls (about 8 oz. each). **Why do you need to waste parchment?? I just used a dusting flour.
7- Working with 1 piece of dough at a time on a floured work surface, and keeping the others covered so they don’t dry out, roll the dough into a 1/8-inch-thick, 10- to 11-inch-wide circle. **This was waaaaay too tough. I gave up after rolling one freakin’ ball out. I pulled out my pasta-rolling attachment for my kitchenaid mixer and used it to roll it to the right thickness. Seriously, this dough was hard to roll out. Maybe I didn’t knead it enough? Maybe it needed more water? Maybe I need to start weightlifting??
8- Using a floured 3-inch round cookie cutter or inverted glass, cut out circles of dough. Transfer the circles to the baking sheet, dust with a little flour, and top with a sheet of parchment so they don’t dry out. Repeat with the remaining dough, stacking the circles between sheets of floured parchment and rerolling the scraps until all of the dough is used. **I couldn’t make my inverted glass cut a damn thing. I used the glasses to make impressions on the dough – yes, I said glasses. I tried two different glasses to see if the edge thickness mattered. It didn’t. I ended up (after much trial and error) using a stupid pizza wheel to cut these circles out.
Can you hear my irritation?
Apologies. Ok. On with the rest of the recipe.
Fill the dough
9- Working with 1 dough circle at a time, brush off any excess flour and hold the circle in your palm. Spoon a scant 1 Tablespoon of the filling into the center of the circle and fold it in half. Using your fingers, tightly pinch the edges together to seal and create a 1/2-inch border. Arrange the filled pierogi on a lightly floured surface or large rimmed baking sheet and dust very lightly with flour; loosely cover with plastic wrap or a clean dishtowel. Repeat with the remaining dough circles and filling.
**A – 1 T is waaaaay to much for these circles. Use 1 heaping TEASPOON.
**B – Pinching sucked. It took forever, the edges didn’t stay closed and the filling kept falling out. I suggest you CRIMP – Pinch and tuck under your next flap. I figured this while making pan *2*.

See what I mean by CRIMPING instead of just pinching?
Cook the Pierogi
10- Position a rack in the center of the oven and heat the oven to 175°F. Bring a 6- to 8-quart pot of salted water to a boil over high heat. Working in batches of 10 to 12, drop the pierogi into the boiling water and give them a gentle stir so they don’t stick together or to the sides of the pot. When they float to the top 5 (after 1 to 2 minutes for room temperature pierogi, 3 to 4 minutes for refrigerated, and 7 to 10 minutes for frozen), use a slotted spoon to transfer them to a platter and keep warm in the oven while cooking the remaining batches.

Just outta the boiling water, about to go sit in the warmed oven
Serve the Pierogi: You can serve the pierogi either boiled or fried.
11a- For boiled pierogi, melt the butter in a 1- to 2-quart saucepan. Sprinkle the pierogi with the reserved onion and drizzle with melted butter. Serve hot with the sour cream on the side. **I forgot the sour cream. I think it could’ve benefitted from it. Next time.
11b- For fried pierogi, melt 4 Tbs. of the butter in a 12-inch heavy-duty skillet over medium-high heat. Working in batches of 10 to 12, cook the boiled pierogi, flipping once, until goldenbrown and crusty on both sides 6 , 4 to 5 minutes per batch. Transfer to a platter and keep warm in the oven. Repeat, adding more butter to the skillet as needed. Sprinkle the fried pierogi with the reserved onion, if you like, and serve with the sour cream on the side.

Fried. Fried is good.
Make ahead tips
The filling can be made up to 1 day ahead; cover and refrigerate. Filled pierogi can be covered and refrigerated for up to 2 hours before cooking, or frozen for up to 6 months; freeze in a single layer on a parchment-lined tray, then transfer to freezer bags.
**I cooked 1/2 the batch and froze the other 1/2. I boiled/fried them – and it was waaaaaaay too much for the three of us to eat (The babies were screaming for dinner while I was in the middle of rolling out the dough. They ate yogurt, bagels, carrots and bananas for dinner. And by ATE I mean rubbed in their hair).
I think this was pretty darn close to the original. I plan on repeating this performance!
Roasted Cauliflower with Dates and Olives By Me (attempting to copy a recipe from Jaleo – restaurant in DC)
Printable Recipe HERE
Dairy-FREE, Gluten-FREE
Ingredients:
1 head of Cauliflower, washed and dried, then cut into florets
2 Tablespoons Olive Oil
12 Dried Dates, quartered longways
12-20 Marinated Olives, Quartered or sliced in half
1-2 teaspoons Smoked Spanish Paprika
How To:
1- Oven to 375ºF. Lay your florets out on a baking sheet. Drizzle with the olive oil and whack into the oven for 40 minutes.
2- Mix the dates and olives in a bowl. Leave them to sit.
3- Toss on the date/olive mix and stir to combine.
**If you’re making this ahead, you can let the cauliflower cool, then heat it up again in a 175ºF oven for about 15-20 minutes.
4- Sprinkle on your Smoked Paprika and stir to combine. Season with salt/pepper to taste – go easy though. You want the saltiness of the olives to be balanced with the sweetness of the dates and the smokiness of the paprika.

MUCH clapping ensued.
Sweet and Sour Cabbage by Elise Bauer from Simplyrecipes.com
Printable Recipe HERE
Dairy-FREE, Gluten-FREE
Ingredients:
1/4 cup (1/2 stick) Butter
1 2-pound Red Cabbage, thinly sliced (about 12 cups)
6 Tablespoons Sugar
2/3 cup Balsamic Vinegar
How To:
1- Melt the butter in a large pot over medium heat.
2- Add cabbage and sauté until slightly wilted, about 5 minutes. **Unless you’re giving the babies a quick bath to get the yogurt outta their hair. Then you’ll throw the lid on the pan, turn the heat to Low, and come back in 15-20 minutes.
3- Add sugar, toss to coat evenly. Add vinegar.

Vinegar is reducing away on the stovetop.
4- Reduce heat to medium-low; cover, simmer until cabbage is tender, stirring often, about 30 minutes. Season to taste with salt and pepper.

A whole plate of clapping!
C said this was a beautiful meal. THAT made it worth it.
Almost.
Print, Email, Pinterest, Facebook HERE!
Related


I love Jaleo! I’m from Charlottesville, Virginia, and I lived in D.C. for a bit and went there a couple times for tapas. I’m so glad you made this cauliflower. Roasted cauliflower is one of my all-time favorite things–I’ll try it (perhaps an easier time commitment than the pierogies.)
My husbands side is Polish and the tradition every year for christmas is home made perogies. My father in law is the perogie maker. He says it is an all day project. He’s getting up there (70 years old) so I told him he needs to start teaching me to make them so I can carry on the tradition. I’m starting to rethink this after your post. But they are ohhhhh so good. He makes 2 kinds. One with potato and onion and the other with sauerkraut. Loved your post.
Ooooh! Sauerkraut? Gimme the recipe? WAIT!!! What the heck am I saying?!?!?!
I think learning how to make these is a good skill to have – especially since every culture has their own form of dumplings.
Even if you don’t remember how to make them, think about what a pleasure it’d be to spend the whole day with your FIL.
(You can always get him drunk – old people have the best stories. *wink*)